I believe our correctly sized battery is group 65, correct? The 87-93 mustangs call for a group 58, correct? Do the Mustang trays swap in without modification into our cars? Mine is cracked, and I want something in mint condition moving forward.
I'm curious because my Optima is now useless after 7 years so a new battery is needed. I'm looking at Sears' DieHard Platinum series (same as Odyssey) as a replacement AGM, since the things never corrode posts or vent gases (had fun with a Costco battery years ago - left a mess in the area). They appear to offer size 34/78 and 65. My current 34/78 Optima has always been loose in the tray, and I want something with a better fit, but if I get a "new" tray from Mustang parts, I think the group 65 one won't work.
I could make-do with my existing fittings and some T's, but I'd like to find the proper parts. The gt40 (tubular) intake doesn't fit without a spacer if I try to use the factory fitting for the PCV line - it is too tall and hits the valve cover. I've seen pictures online of some that look to be almost half an inch shorter than the one I have. I'm sure someone has something around their shop. Does anyone have some shorter vacuum fittings that I could use?
I have a Precision Industries "3500 stall" single-disc lockup converter in box fresh from PI (previously used) ready to go into the car. I am second guessing myself and am curious if it's worth sending back to PI to have it switched over to multi-disc so the car can be locked up at WOT. Anyone have opinions on this? From what I understand, with any decent power, the single disc won't stay engaged at WOT.
The only thing holding me back is the $485 parts and labor charge. Expensive, but if it's the type of thing that only needs to be done once...
The only other consideration is that I don't remember if I can control lockup under wot at only certain conditions. I know lockup will hurt if it's always locked at WOT, since it would lose the torque multiplication below. I need to see if the Baumann TCS give me more control than simple TPS and gear conditions.
For years I have been pretty much set on betting a BendPak MD-6XP due to the excellent reviews they receive. I really don't have the room for any posts in the garage, or will I re-slab the thin, cracked garage floor in the house I'm at now. A scissor lift would work well as a secondary lift in whatever future garage I may be able to put together. The Greg Smith Atlas TD6MR is also a decent lowend lift.
These things are currently going for $1900 shipped and can lift up any vehicles I'd be working on (not trucks of SUV's) up to 4 feet off the ground. The BendPak unit also has a fairly low minimum height with the shortest pads.
I was set until I found people comparing these, along with some $3-5k lifts, and then the Harbor Freight unit came up, including its 56" of lift. At $1350 everyday price, it is around the lowend of others' pricing pre-shipping, but the 20% (and this week's 25%) coupons work on these things, making it $1012.49 (and special order of course). No stores carry these types of things to check out, so I can't study the weld quality or locking bar thickness, my two main concerns with something so cheap.
Saving $900 is saving $900. Other than two cases I found of hydraulic seals and the electric motor not working, no one has had any complaints about the HF units (most being the older 39" version that was clearanced and discontinued in early June). All the units are build in China, and what really matters for safety is the metal thickness, welds, and strength at the rotating joints. I don' t know if it's smart to trust other brands more when using a scissor lift, but it just seems I'd be more careless with something not sold from Harbor Freight. A good unit would also be a more long term investment if it holds up, and $900 over 10+ years isn't really anything.
Does anyone have an opinion on this? I also don't currently want the awesome looking BendPak SP-7X at $4500. It's nice to see no-post lifts (at over a ton weight) that provide nearly full access under a vehicle.
I've always wondered this. I have TC rear disk brakes with equal parking brake cable tension on both sides. I can push the parking brake down very hard, but if I put the car in drive or reverse (auto), the car creeps quite quickly. Do our parking brakes just suck? Is it related to the foot pedal not giving us enough mechanical advantage to provide enough clamping force? Is there a way to strengthen this up like newer cars, without switching to a hand brake (which would actually be nice to do)?
Maybe I'm just used to newer cars that I drive with hand brakes having smaller engines, and the torque on them can't overcome the friction like the 302 can.
I'm pretty sure I asked something like this long ago, but I can't find the thread. Once again I cannot find the second wire/single pin that is used when attaching a code reader to run KOER tests. Where does the wire come out of? I thought it might be hiding in some wire loom, but I cannot find it.
Does anyone have ANY idea why the alternator and air conditioner aren't swapped around? Did any vehicles come with the A/C on the other side with a 302 motor? The condenser and evaporator fittings are both on the passenger side. Was it only due to the smog pump and lines? Are there any factory brackets available that might allow me to move it to the passenger side? I'm curious about making one to clean up the engine compartment GREATLY, AND have a short alternator to battery cable.
What was Ford thinking? Swapped around the other way would lose weight off the front and and require less refrigerant. Mainly, the A/C hose on the top of the motor is a pain and I don't see the reason for it. The alternator should also be over by the battery...
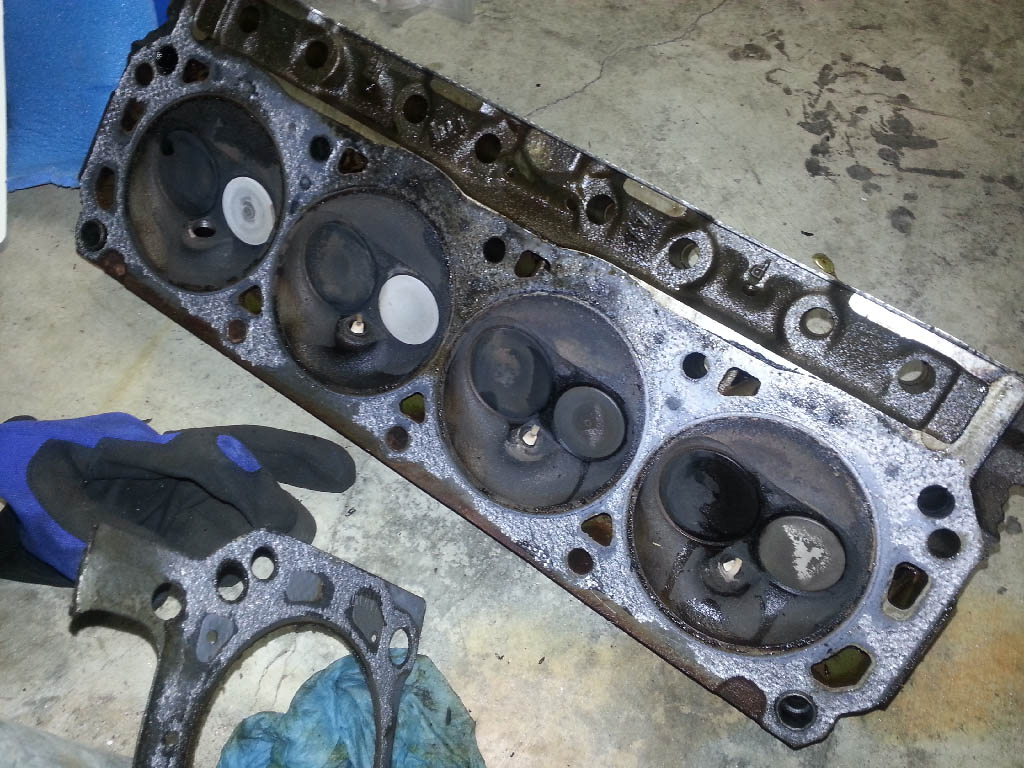
So I've pulled my old GT40P heads off today and found that one has a pretty nasty looking exhaust valve. I only know of this type of issue as possibly a cracked head? Input?
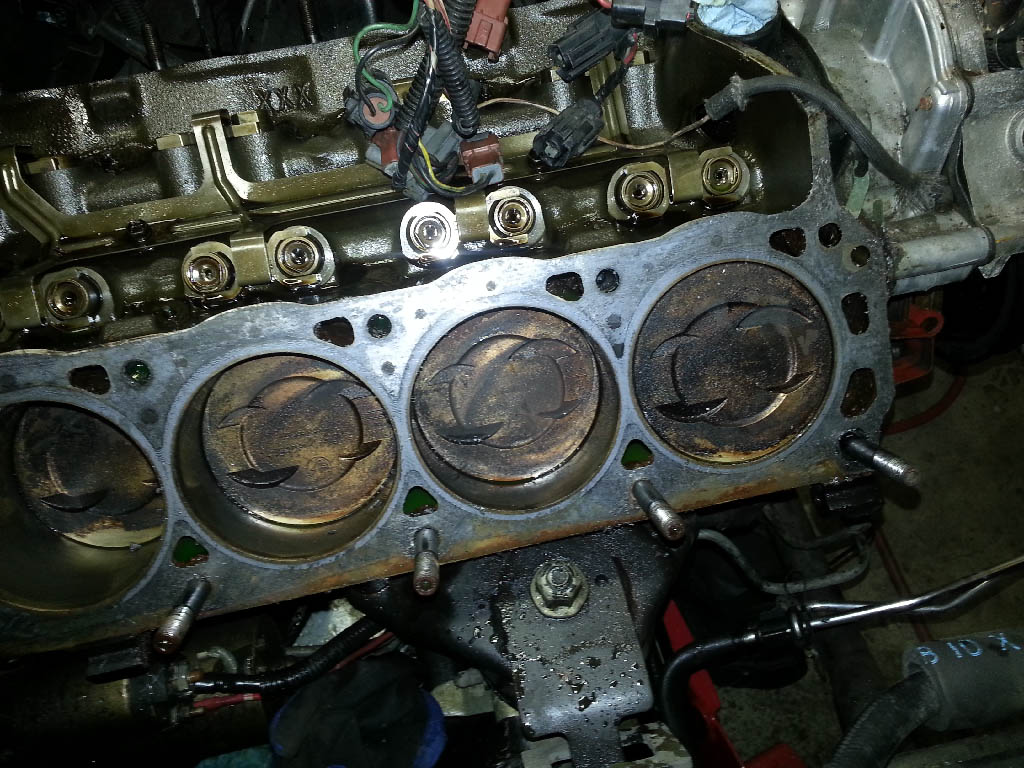
Gathering numbers from the engine today, the block was originally zero-decked and had a pretty large quench height (0.47-0.48) since the installed gaskets were PT9333. The new heads going on are TW measured at 56cc but I stopped since I wanted to pick up new dowels. I should have a quench height of 0.39-0.40 and ptv clearance appears to be a bit over 0.300. I'm guessing the motor is going to run much better using 87 octane at 9.7:1 compression on aluminum heads, than the 9.2 or 9.3:1 it was trying to do on the iron gt40p heads, and without what was going on in that one cylinder. Everything looked good otherwise. Going back to my Comp Cams lifters and using stud mount rockers, I'm hoping the valvetrain will be a bit quieter.
I am getting ready to purchase a small hobby-level CNC router/mill (I will have both spindle speed ranges). I'm trying to think about what physical sizes of jobs I may wish to use it for. The small CNC machines have working areas of 12x23x4" and 28x28x4".
The smaller one is a little more rigid and will work better for PCB work. The larger one would be big enough for just about any home projects it seems, but those rare instances could also be done manually (for example, large speaker boxes with a circle jig). The larger CNC router frame costs over 50% more than the smaller one. Other than price and rigidity, they are otherwise the same in terms of performance - they provide the same fairly small servo motors, but ones that the frame can hold up fine with a sane cutting speed in aluminum with 1/4" end mills.
Can you guys provide any valid projects that could make more use out of something larger than 12x23" in a home environment? With the 17" full width of the table, it seems big enough to replace my MDF baffles for my subs in the trunk with 12" subs (11" cutout). I can't think of any other reasons off the top of my head, but I also don't want to regret getting the smaller unit that is easier to store, but provides finer control for electronics work. I'd hope that if I needed more space, I could move up to a much more rigid larger unit when I also have "excess shop floor space" in a future house.
Guys, I'm picking up a vehicle that is a few states away but looking for some details on how to best set everything up. I am basically going to swap my daily driver for one with 100k fewer miles and much better condition. I owe another $2k on my current car through a credit union. I figure the best route to take would be:
1) Get new loan from credit union that covers new vehicle and pays off current car so I can get the title sent over here. 2) Put check into own account and let bank handle wire transfer 3) Arrange transportation through transport company 4) Send title to credit union 5) Sell current vehicle and put toward new loan (if the next year is the same as the last 10 months, it'd actually be better to add that money to my investments, but whatever I do, this part's easy) 6) Properly maintain new car, unlike a certain previous owner of my current car.....
My questions are: 1) Although I have no reason to think ill of the seller as all communication and requested information has been good, what protects me on the payment between the seller getting the payment and the car being shipped? 2) Who should I look at for transports? It seems the broker Alpine Auto Transporters may be decent?
I technically COULD fly down and drive it back for 12-13 hours, but the money saved could just be made up by working for the day instead. Plus, the car has no cruise control and it's extremely noisy stock. It wouldn't be an enjoyable 800 mile ride without modifications.
I'm hoping that someone has a bracket that I can pick up. From what I understand, the Mustang ones are different and steel, and that I may need ours to use with our A/C compressors? Upcoming head swap makes me want to install one that isn't so ugly as what I have on the car now (imo).
So this will be the thread that I will use to design and fabricate a single-piece headlight assembly for the 1987/1988 Thunderbirds.
Purpose of this build:
1. Single piece headlight assembly with no seams between 2. Use a completely clear lens. Ditch the sloppy light control and losses that fluted lenses create. 3. Assembly must bolt up to the stock header panel holes and NOT require cutting the header panel 4. Use one or more projectors for the headlight 5. Utilize LEDs only, including the headlights 6. Keep high beam, likely using a HID projector with solenoid 5. Provide adequate heatsinking for LEDs that are installed.
What this build will NOT incorporate:
1. A way to "replace" bulbs, since I will be using LEDs, they should last forever. Any replacement would require dis-assembly and removal of dead LED, then installation of new LED. After all, by the time an LED fails, there should be much better ones out there to use at that time. 2. The initial build will not be made from a mold that can be cast with resin in the future. If a housing and lens assembly can be found to work, I MAY make a mold for other people to buy castings of, then design their own internal headlight designs. I will not make multiple of these headlights to sell due to the complexity that the first attempt to have.
Foreseen issues to resolve:
1. How to aim the projector assembly? This includes rotation, vertical, and horizontal. 2. How to form the lens over such a wide headlamp assembly and get the sides to wrap around enough to provide a good seal all around. This may just work, but it will take some practice with s sheets first. 3. What can be done to make the entire headlight assembly look filled out? We have one large headlamp, and two fairly big marker lights. The huge amount of surface to do things with so that the headlights look good will be difficult to design. I'm not that creative. 4. What kind of heat will I experience if all heatsink fins are contained within the headlight assembly? This provides thawing of the lenses, but it is also an enclosed environment that can heat up when pushing 40-50 Watts of heat into the housing, and the output diminishes as the LEDs heat up. This will just need some test results with a thermometer.
Any and all ideas and aide will be appreciated. On that topic, anyone have any busted TC inner marker lights? I have a spare set of outer markers, headlight aiming brackets, and housings. I also have a headerpanel to mock this all up on. I also have plenty of mediocre quality (3M) fiberglass from using one of those $50 off $100 home depot coupons. Either way, I think most of the housing will be made out of aluminum rather than any sort of resin.
I'm looking for the following items - please let me know if you have any of them.
1. Floor shifter light bulb holder 2. Floor shifter gear selection trim (the part that displays the gear you're in) 3. Lower dash trim for antenna switch, with switch 4. TC door panel light lenses 5. Non-turbo panel door lock switches for driver side 6. TC door lock swiches and panels. I paid for some on here some months back, but the seller disappeared earlier, before he was to go overseas..... 7. Any various screws you may have for the interior panels - the ones with the built in "washer" that prevents the screw's turning motion from digging into the panel.
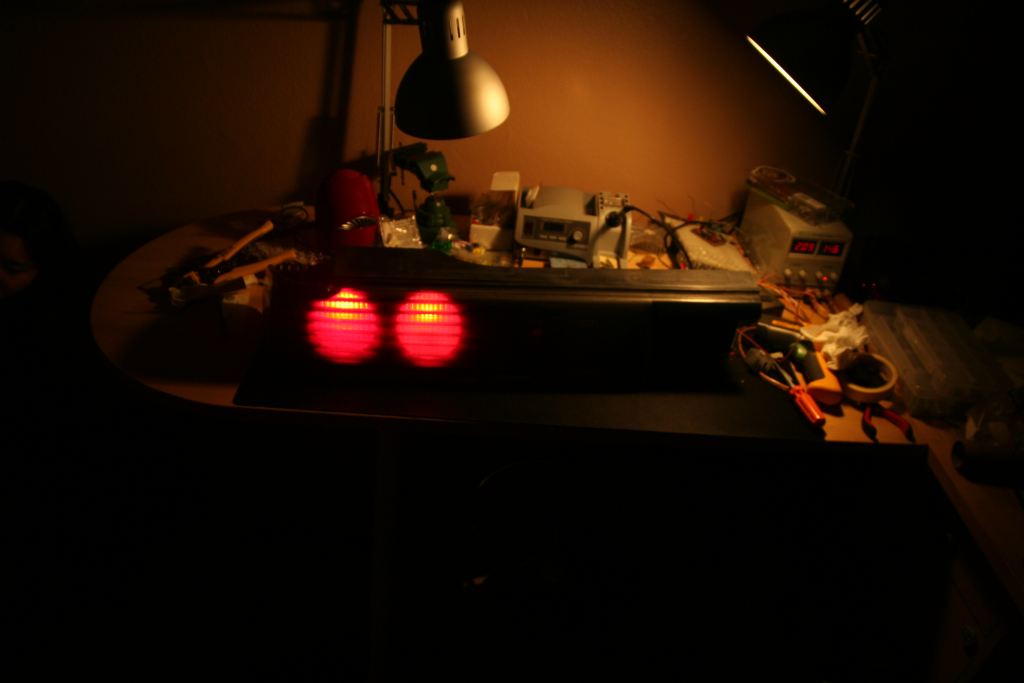
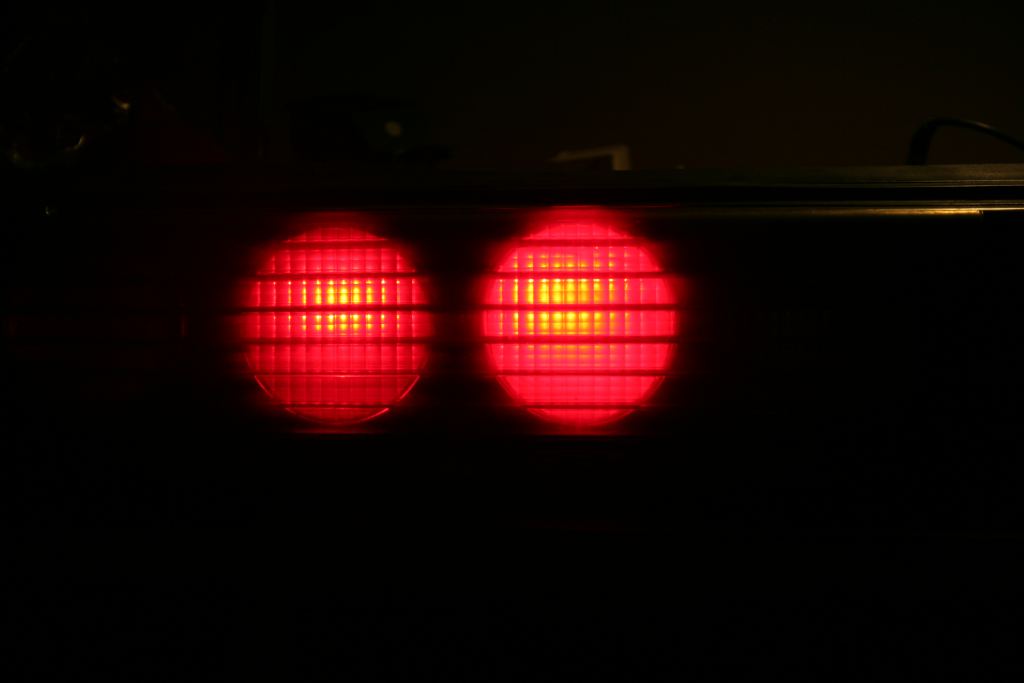
So I started to test some things with swapping the tail lights over to LEDs and ran into an issue that makes it a showstopper until I can get over the obstacle. I had previously purchased a dozen 2W red LEDs to use in the tail lights, side illumination, and third brake light. Having a spare, DIRTY, set of tail lights to play with, I started doing some beam and heat testing. You will find that I started with the lenses dirty, tried to then clean them a bit, finding that I need to polish them up to get them clear again, and eventually ended with just the inner filter lens that I washed with only water. It also needs polishing, badly.
Anyway, so I went to test the 2W LED next to the 27W stock bulb being fed 14V to provide about the max output that I'd expect in the car with a healthy alternator. The LED was getting a little under 2W with a ~650mA driver. I'm not using 5mm LEDs due to the quantity needed, and having 200 per light will cause some to prematurely burn out due to taking current sooner than others every time they flash on. Using quality single emitters are best EXCEPT, for the problems noted in this thread.
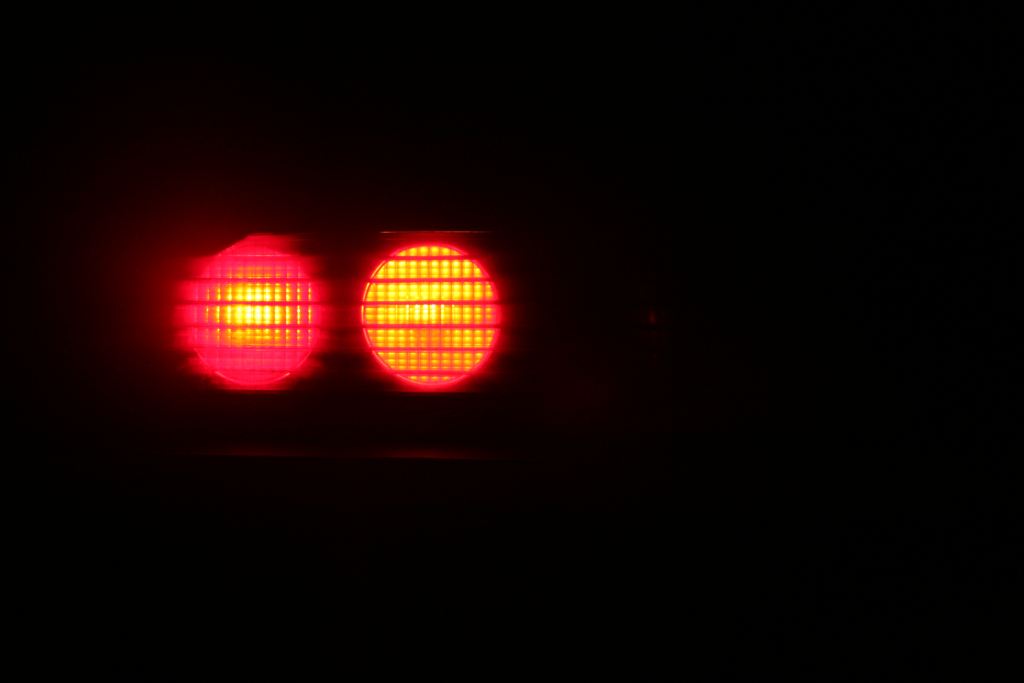
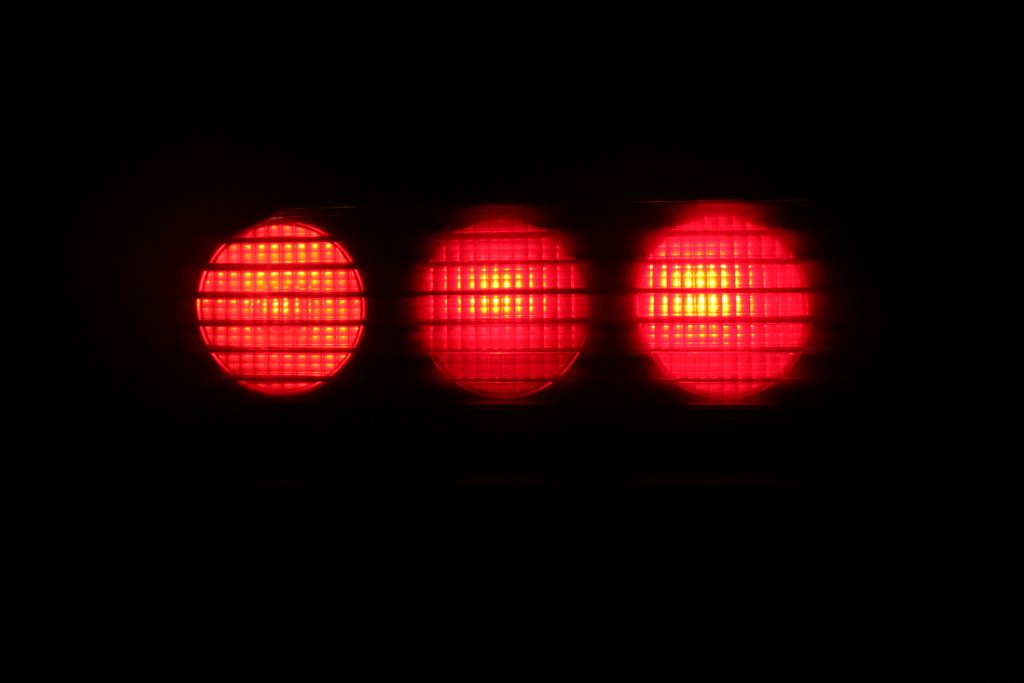
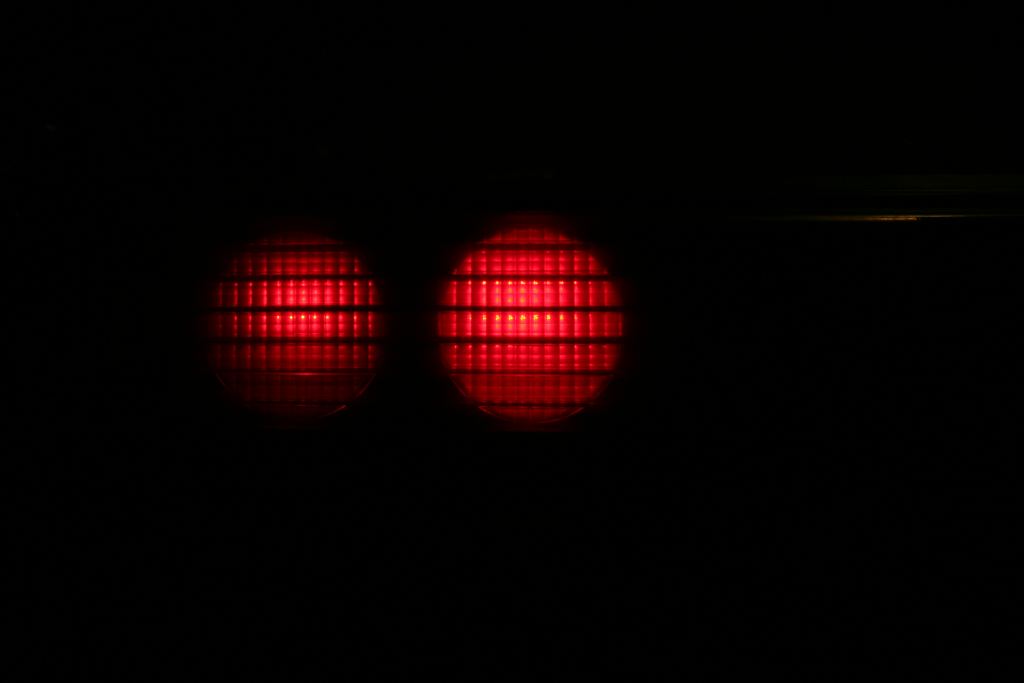
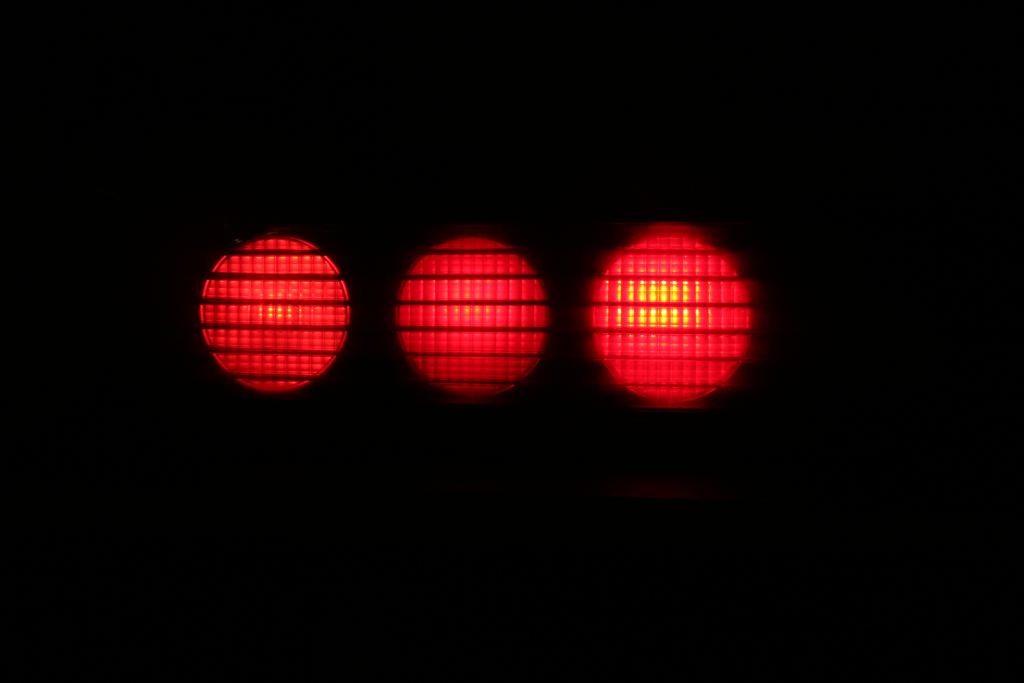
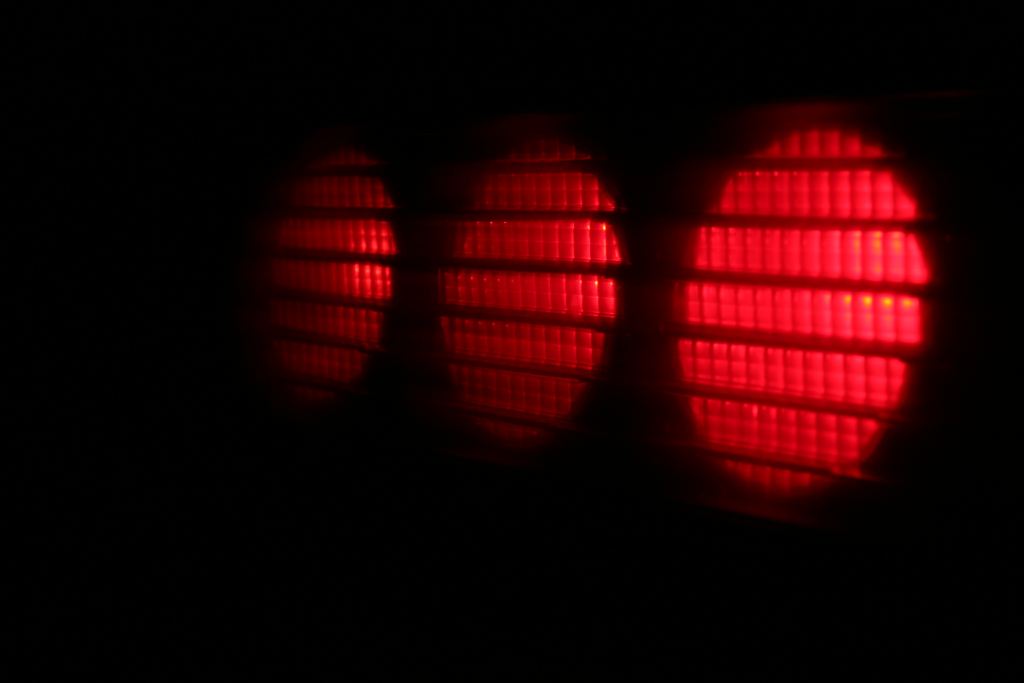
Here is my initial result, the same as hos I tested it on the car. It looks pretty good, and even better in person. The camera makes both lights appear to be about the same level of red, but the stock bulb is MUCH more orange in person - so much that is looks terrible. Can you guess which side is which?
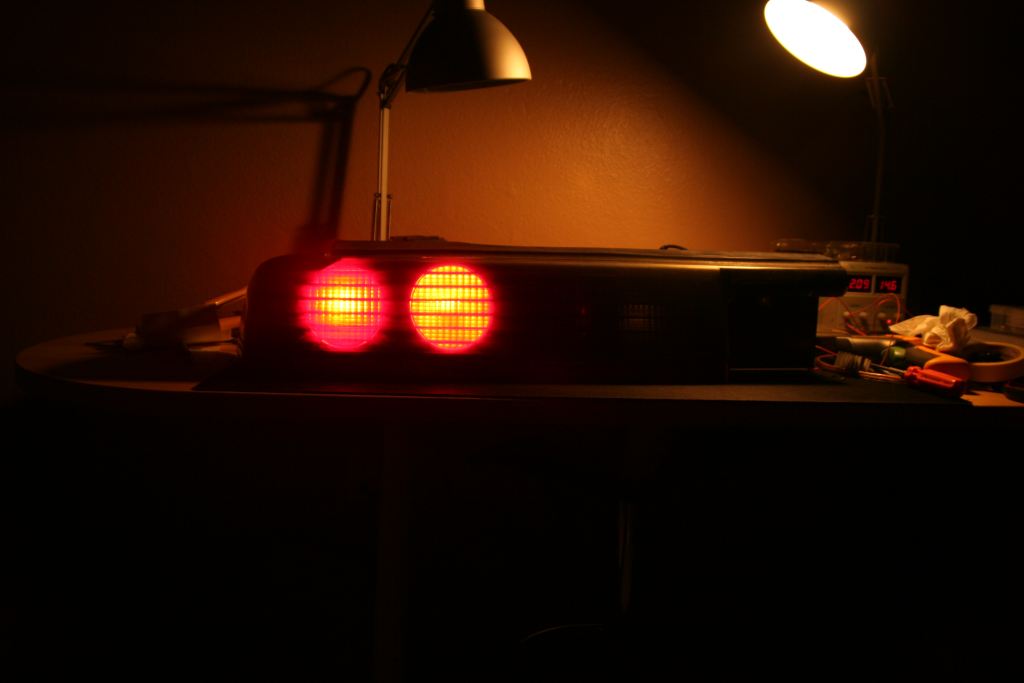
The next few shows clearly demonstrate the problem I have. note that the color appears orange in these photos due to the intensity of the light, not that the light is actually orange. As usual, I took photos with a few different camera settings to help show the output, and to get a realistic idea on which bulb is actually brighter by reviewing the dimmest of photos.
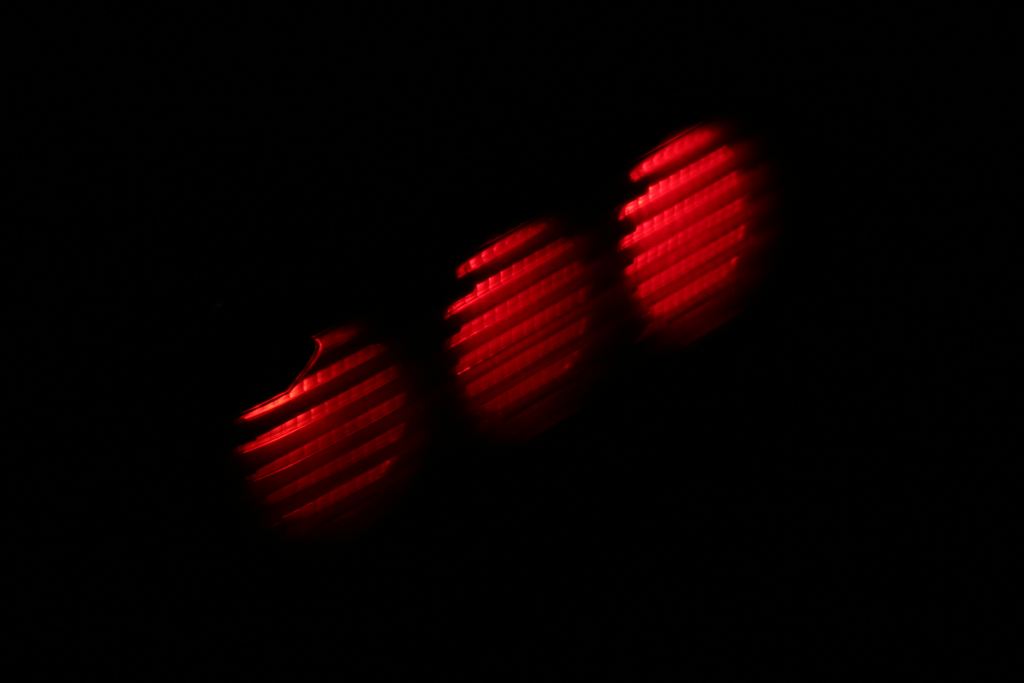
In person the left bulb, the LED, appears much more intense than the incandescent bulb, possibly due to how vibrant red it is in person. The red is bright enough up close to cause red colors in the room to become orange-ish due to oversaturation. The problem here, as you can see, is that the LED is brightest in the middle of the tail light lens, and very dim around the outer edges. I believe the red LEDs have a viewing angle of only around 120 degrees, causing the directional light I am seeing, much more than 180 degree white LEDs. The incandescent bulb uses the reflector well to fairly evenly illuminate the entire red circle. I like the look of the full illumination MUCH better than small bright spots near the center. The LED also appears as if it may actually be putting out a bit less light than the incandescent bulb.
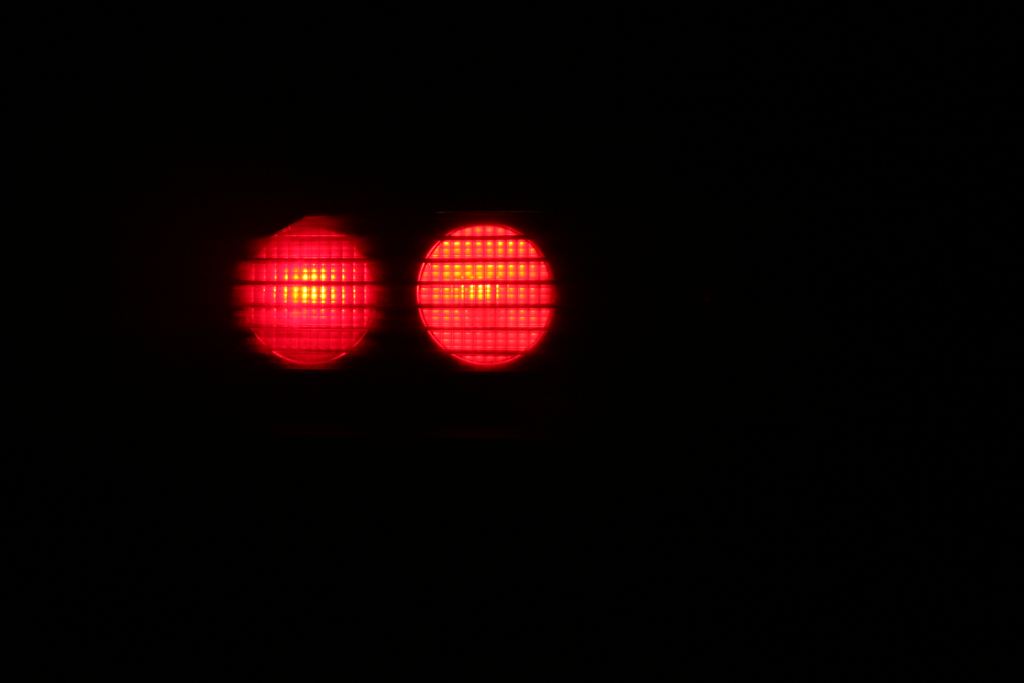
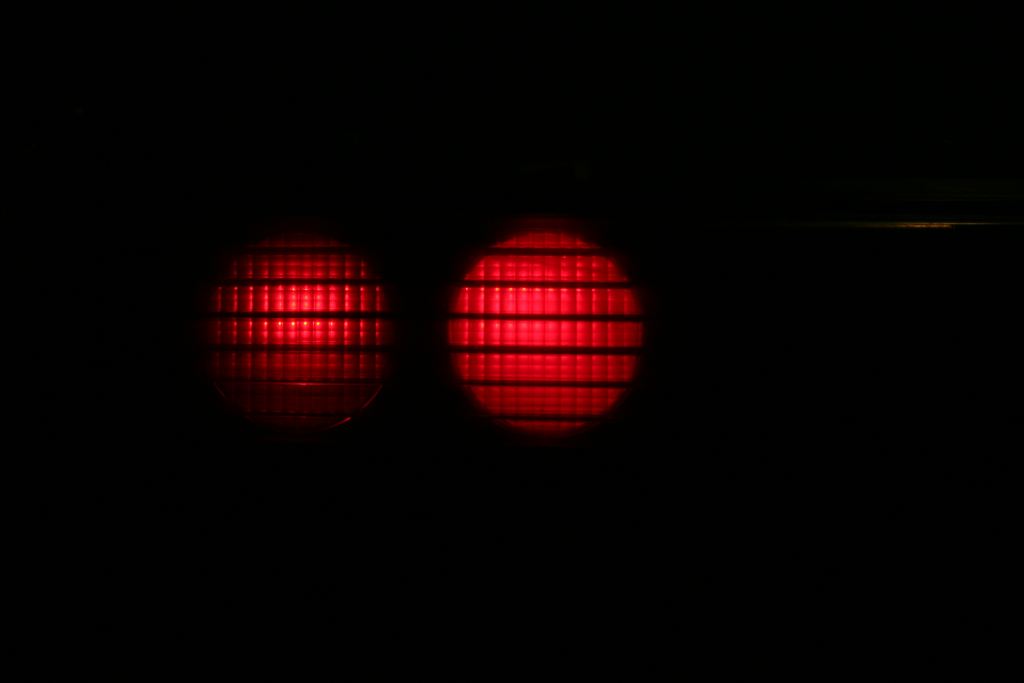
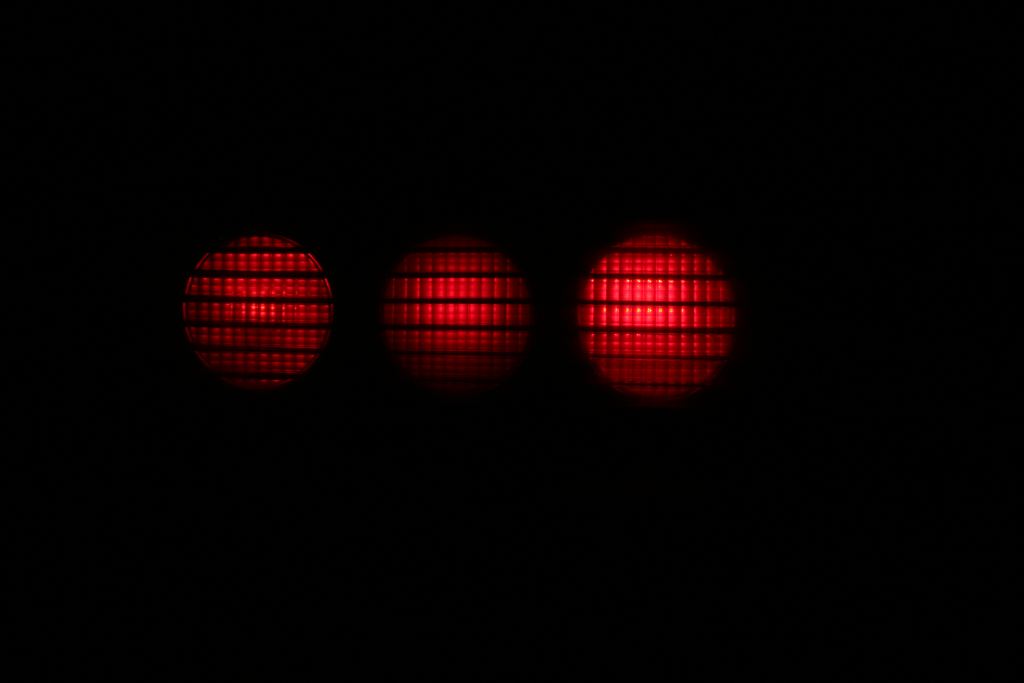
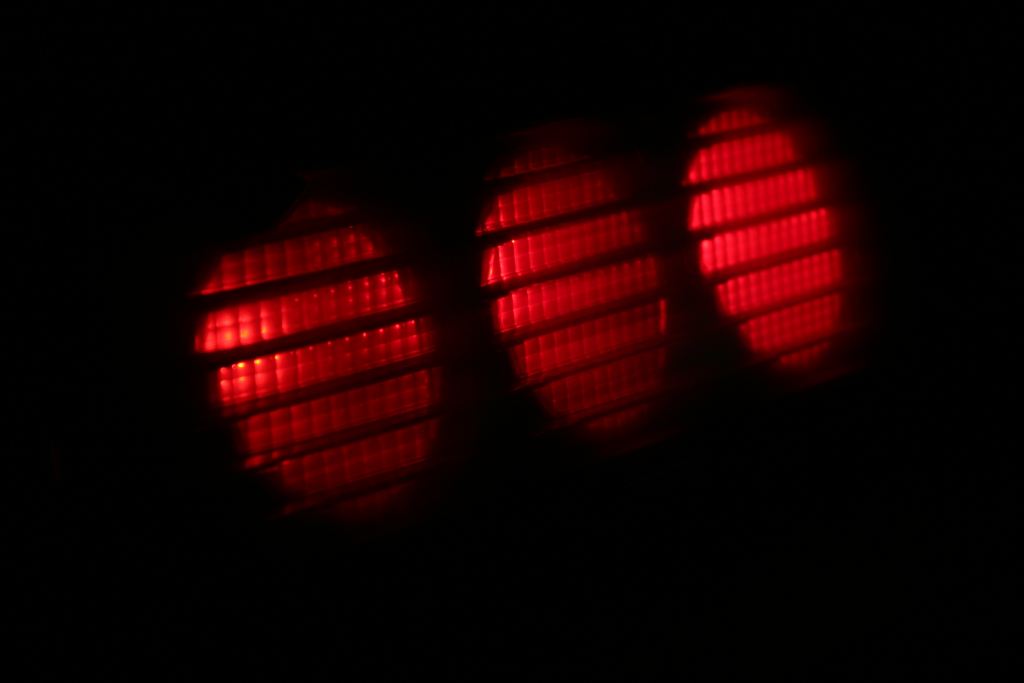
SO, off to test the two bulbs with a THIRD bulb, rated for 300 lumens. I cutout the rear of the third light and slapped the triple red emitter in place. This LED runs at 8v, 650mA with these drivers, or just above 5 Watts. The problem with using these LEDs are the price, and they need much larger heatsinks to be installed. The 2W single LED and 27W incandescent were swapped around so it is now arranged in the photos as 27W incan - 2W LED - 5W LED.
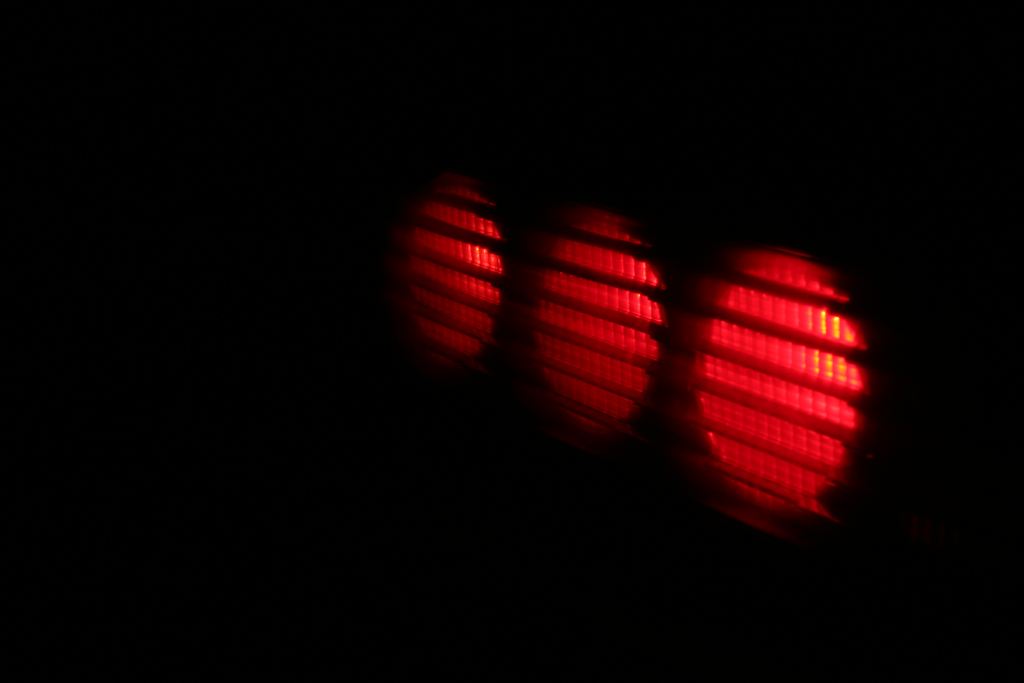
So I'm thinking wow, the light is a bit more full, and a LOT more bright. The edges of the red circle are still darker than the incandescent bulb though...what is the best way to solve this? From the side it looks great, but straight back, it just reminds me of the faint center glow of older <1980 cars, a look that I just never liked.
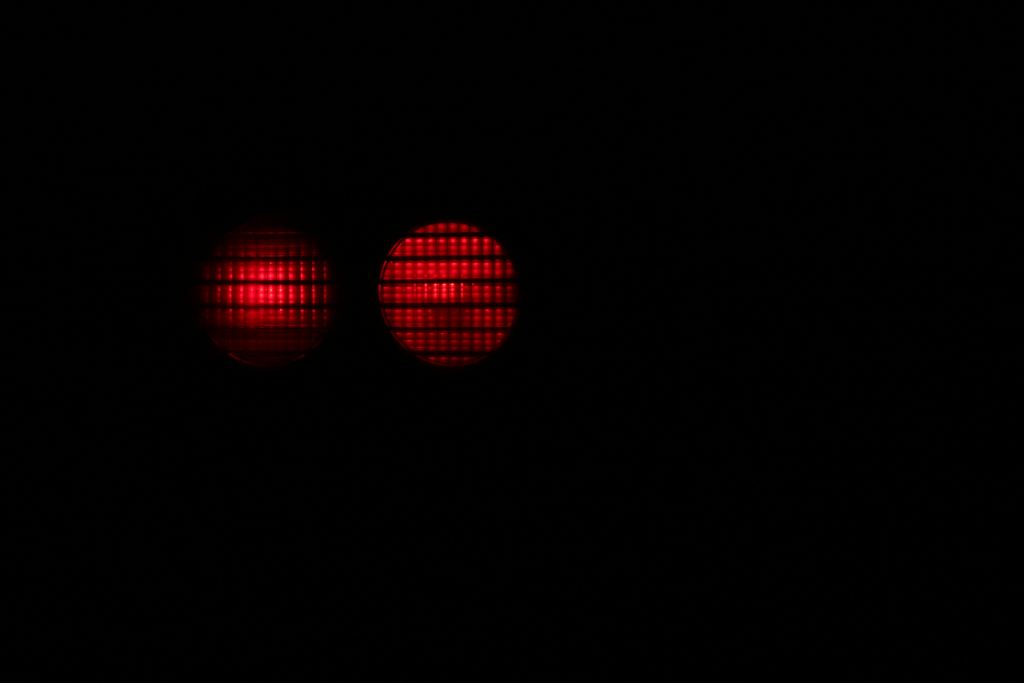
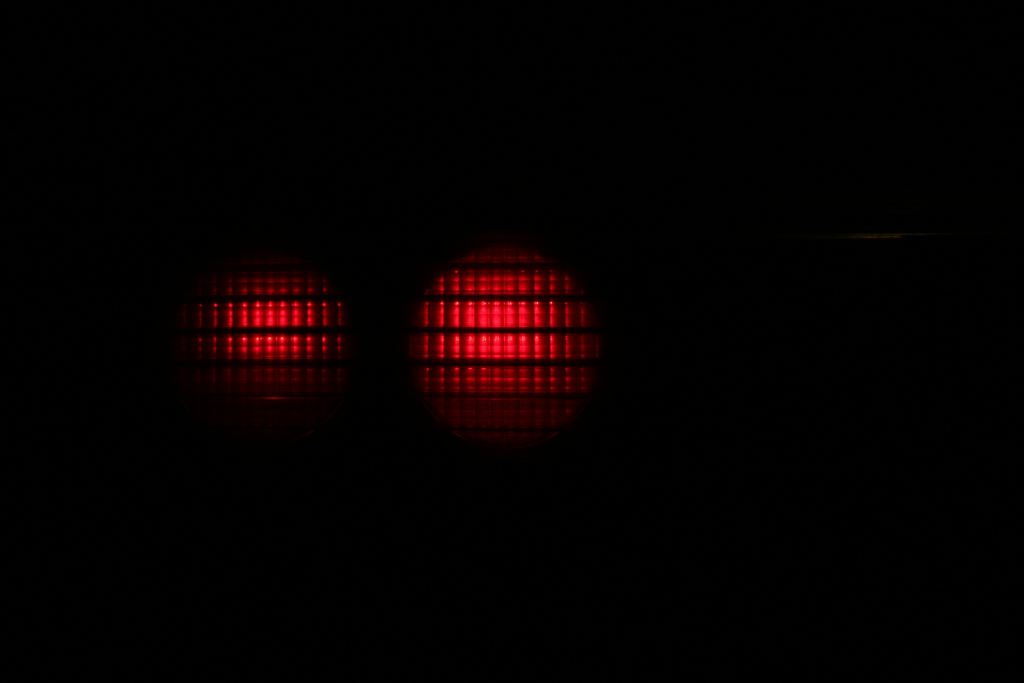
Here I am trying to compare the two LEDs directly:
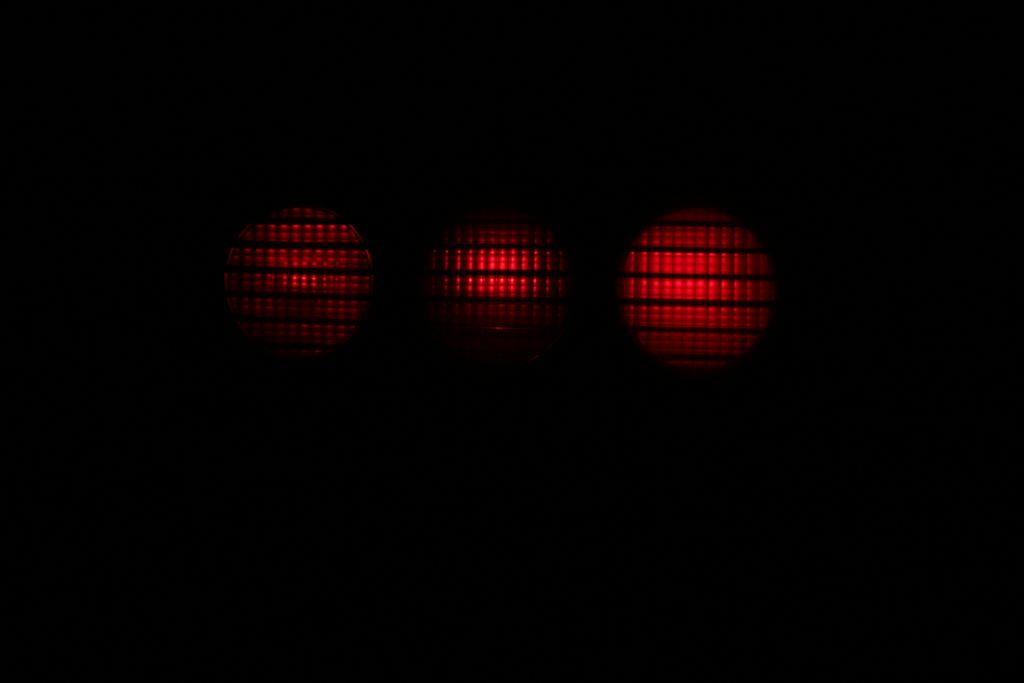
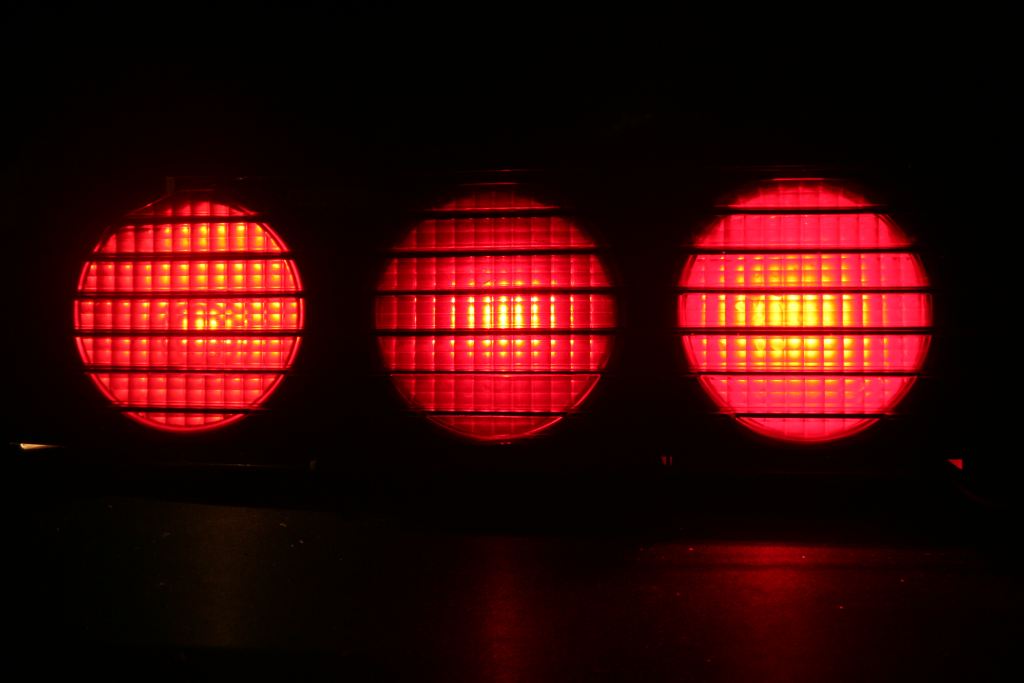
So yeah, the 5W one fills out much better, but it is still lacking. Now I didn't want to do this due to loss of light, but I cut out a square piece of polycarbonate and sanded a circle into the middle on both sides, hoping to remove some of the light from the center and move some of it to the outer edges. It's a terrible idea from an efficiency standpoint, but I had to try a frosted lens of some type. I applied it to the 5W LED:
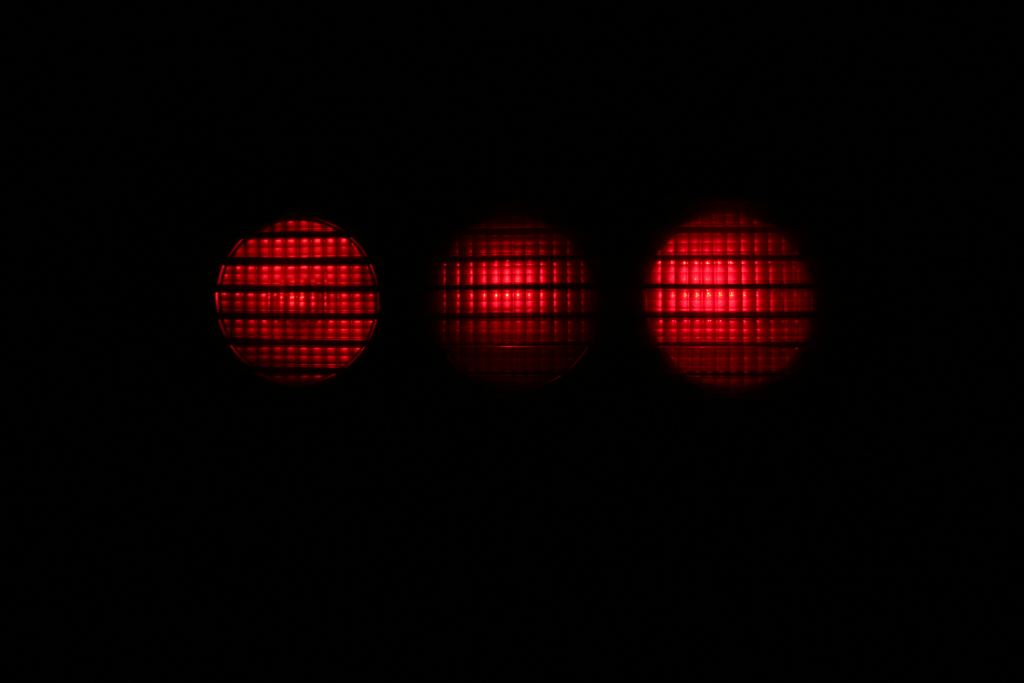
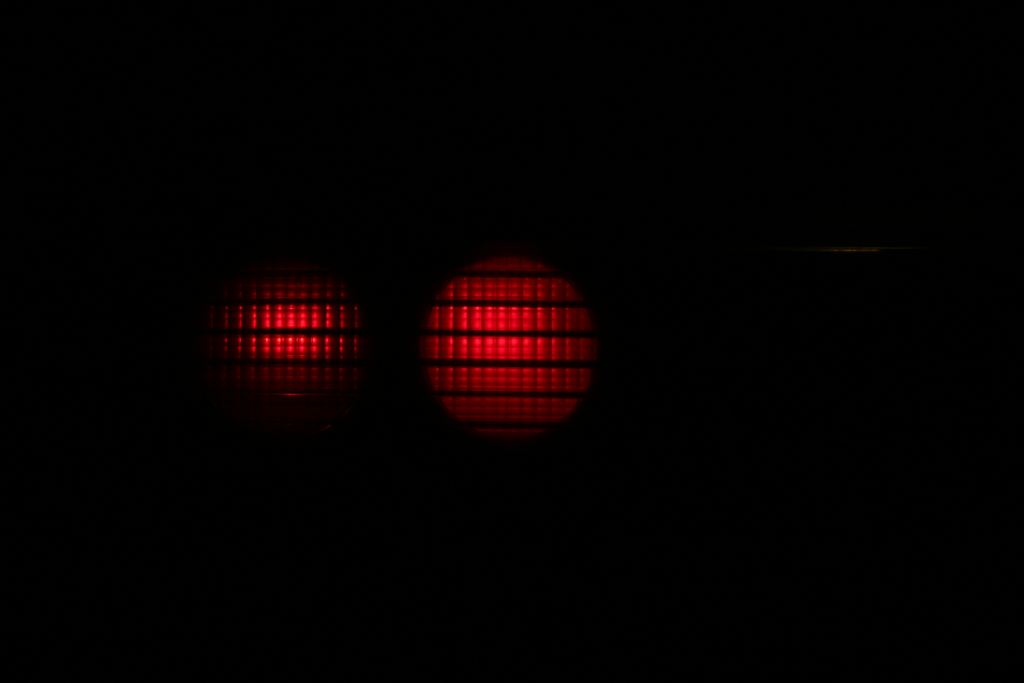
Okay, so I can see the outline of the circle a little better. Let's try that at a faster shutter speed to pick up the details of the improvement along the edges:
Without frosted lens:
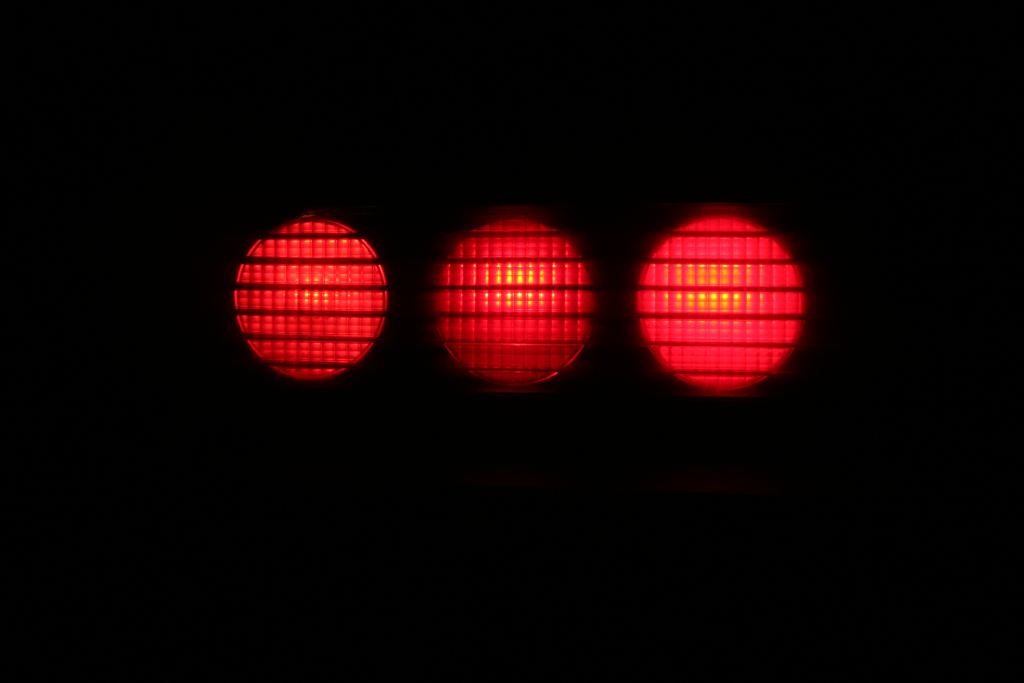
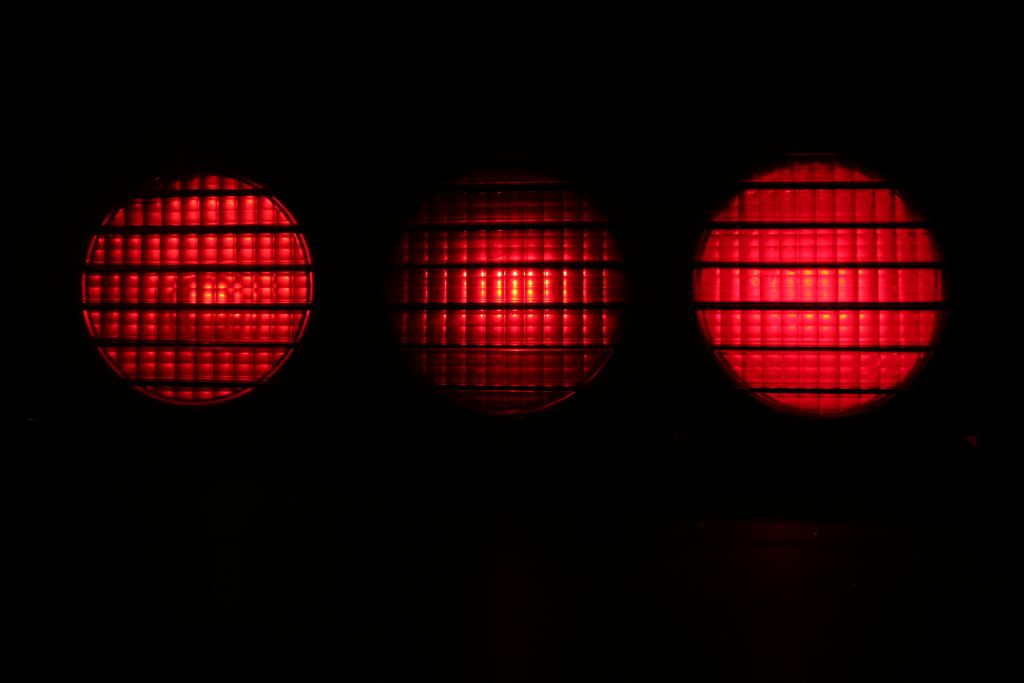
With frosted lens:
You can see that the middle has lost a lot of intensity and it appears some of the "glossy look" is gone due to much more even lighting. So how does the 2W LED do with a frosted lens? I moved it to the middle/2W light and got this:
Okay, so the 2W bulb is just too weak compared to an incandescent. 5W triple it is! Final shots with the frosted lens on the 5W LED:
I hope to find a clear lens, something like a double concave, to help distribute the light rather than rely on a frosted layer that consumes light. I'm looking to pickup some 4" bowls of some kind to test as reflectors to help aim any stray light back to the edges of the red circles. With that, just about any double concave lens would work well to shift the light around. I don't know how well a single sides convex lens would help, of course defocused. Only having two of the 5W LEDs, I ordered more and they'll be here in a couple weeks, so I have some time to play with optics in the time being.
For tonight, pull my interior back apart and figure out why both my left and turn turn signals unlock my doors on every flash, assuming an alarm box problem........